Snow ice cream is a delightful, nostalgic winter dessert made using freshly fallen snow mixed with simple ingredients like milk, sugar, and vanilla. It’s a fun, no-cook recipe that originated in snowy regions where families would transform a snowfall into a spontaneous treat. Beloved for its light texture and quick prep time, this icy dessert offers a refreshing and playful twist to traditional ice cream.
Whether you’re introducing this to kids for the first time or reliving childhood memories, snow ice cream is a seasonal favorite that captures the magic of winter in every bite.
Ingredients
Base Ingredients:
-
8 cups of fresh, clean snow
-
1 cup whole milk (or any plant-based alternative)
-
1/3 cup granulated sugar
-
1 ½ tsp pure vanilla extract
-
Pinch of salt (optional, to enhance flavor)
Substitutions:
-
Milk alternatives: Almond milk, oat milk, or coconut milk
-
Sugar alternatives: Honey, maple syrup, or stevia (adjust to taste)
-
Flavor twist: Replace vanilla with peppermint extract or cocoa powder for a different taste
Step-by-Step Cooking Instructions
-
Collect Snow
-
Scoop 8 cups of fresh, fluffy snow from a clean surface right after snowfall.
-
Avoid using snow that’s touched the ground or has been sitting too long.
-
-
Mix the Base
-
In a mixing bowl, whisk together the milk, sugar, vanilla extract, and salt until the sugar dissolves completely.
-
-
Combine with Snow
-
Gradually add the snow to the bowl with the milk mixture, stirring constantly.
-
Mix until it reaches a creamy, soft-serve consistency. Don’t overmix—it will melt quickly!
-
-
Serve Immediately
-
Scoop into bowls or cones and enjoy right away. Snow ice cream melts fast!
-
Common Mistakes to Avoid:


-
Using old or dirty snow.
-
Overmixing, which causes it to turn slushy.
-
Adding too much liquid—start small and adjust for desired texture.
Pro Tips and Cooking Techniques
-
Use chilled bowls and utensils to help keep the mixture cold and slow down melting.
-
Add mix-ins quickly (e.g., mini chocolate chips, crushed cookies, sprinkles) for texture and flavor.
-
For a richer taste, use sweetened condensed milk instead of milk and sugar.
-
Keep the snow fluffy—not packed—to ensure a light, airy texture.
Variations and Customizations
Flavor Ideas:
-
Chocolate Snow Cream: Add 2 tbsp cocoa powder or chocolate syrup.
-
Fruity Twist: Stir in strawberry or raspberry puree.
-
Peppermint: Add crushed candy canes and peppermint extract.
Dietary Options:
-
Vegan: Use plant-based milk and maple syrup.
-
Keto-friendly: Use unsweetened almond milk and erythritol.
-
Gluten-free: Naturally gluten-free, just check any added mix-ins.
Regional Fusion:
-
Add condensed milk and fruit syrup for an Asian-inspired snow dessert.
-
Top with dulce de leche or cinnamon for a Latin-style twist.
Serving Suggestions
-
Serve in chilled bowls topped with:
-
Whipped cream
-
Chocolate chips
-
Fruit compote or jam
-
Sprinkles or crushed cereal for crunch
-
Pair with:
-
Hot cocoa or warm apple cider
-
Gingerbread cookies or shortbread on the side
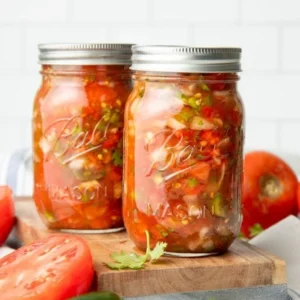
Presentation tip: Serve in mason jars for a rustic, Instagram-worthy look.
Nutritional Information (Approx. Per Serving)
-
Calories: 150
-
Protein: 2g
-
Carbohydrates: 26g
-
Sugars: 22g
-
Fat: 4g
-
Saturated Fat: 2g
-
Sodium: 50mg
Note: Values vary based on ingredients and serving size.
Frequently Asked Questions (FAQs)
Q1: Can I store snow ice cream?
A: It’s best eaten fresh. If needed, freeze in an airtight container for up to 1 day. Thaw slightly before eating, but texture may change.
Q2: Is it safe to eat snow?
A: Only use freshly fallen, clean snow. Avoid snow near roads, roofs, or anything contaminated.
Q3: Can I make this without sugar?
A: Yes! Use natural sweeteners like honey, agave, or sugar-free alternatives.
Q4: My snow ice cream is too runny—what went wrong?
A: You may have added too much liquid or used packed snow. Try starting with less milk next time.
Closing Thoughts
Snow ice cream is a heartwarming way to embrace winter’s magic with minimal effort and maximum joy. Whether it’s a snow day activity or a cozy dessert after dinner, it never fails to bring smiles. Feel free to experiment with flavors and toppings—and most importantly, have fun with it!